Metzen
Content Type
Profiles
Forums
Events
Everything posted by Metzen
-
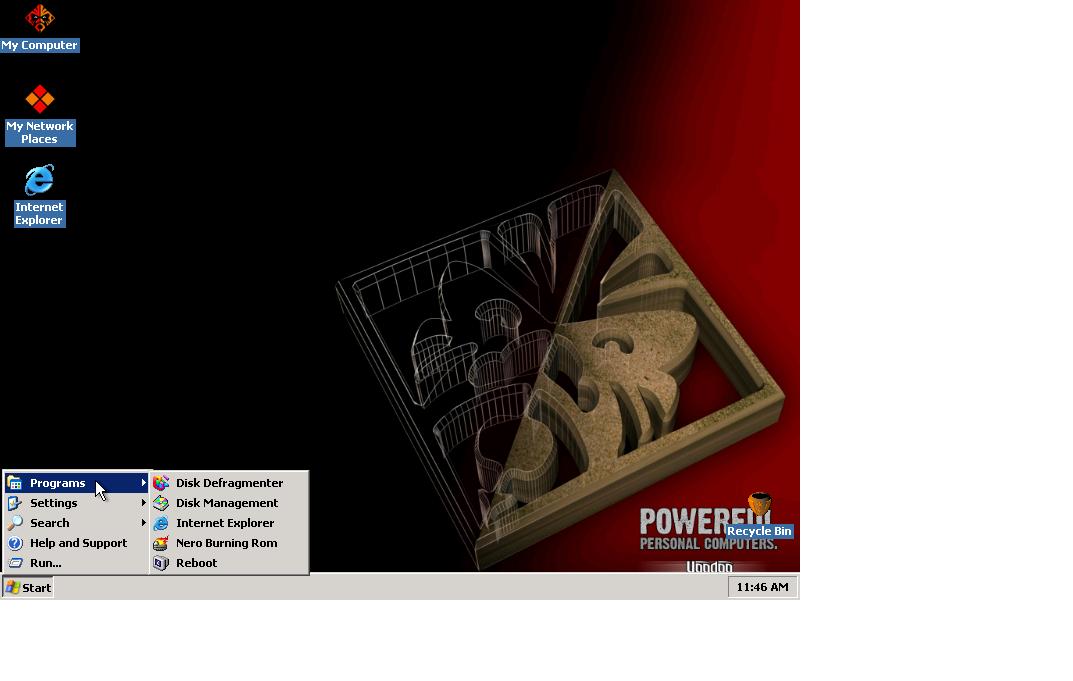
Just search for Metzen on the 911cd forums. I made a couple of tutorials on making the MMC work within WinPE, including the disk defragmenter and disk management console. Here is the link with instructions on how I got it working. I used the same guide to get the MMC working in WinPE 2004. There was a lot more work involved in getting Explorer and IE working, including getting the MMC's to not need rewritable media (IIRC, you have to create a MMC folder somewhere that makes it so you don't need R/W media). [EDIT] I used this method to get Explorer working within Windows PE.
-
Ghost 9.0 uses Windows PE for it's recovery disk? The TXTSETUP.SIF should be in a folder in there I think...
-
Can you still post it? I want to see how they got the FastTrak Controller to work with both SATA and RAID mode (ULSATA and fasttx2)
-
Windows Update ActiveX And Update
Metzen replied to paul3vanz's topic in Unattended Windows 2000/XP/2003
I asked this question on Microsoft's forums and here was the reply: So Microsoft says it's not possible, but they also say that you can't install Explorer in WinPE, so maybe if we keep cracking at it, we'll figure it out -
Windows Update ActiveX And Update
Metzen replied to paul3vanz's topic in Unattended Windows 2000/XP/2003
I think Windows Update v5 downloads 7-10 cab files now I don't know which are really relevant... -
Guide For Compressed Drivers Unattended Install
Metzen replied to serialzs's topic in Device Drivers
Is it possible to add registry entries during textmode setup that are carried over to GUI mode setup? I've edited the HIVE*.INF files before with success for adding registry keys to setup (using this method among others), do they carry over to regular Windows setup? -
Select Software To Install GUI interface
Metzen replied to Astalavista's topic in Unattended Windows 2000/XP/2003
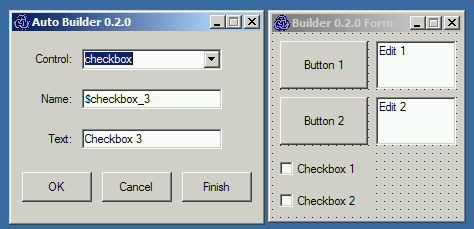
With AutoBuilder (linked in my previous message) here is a GUI one can create in a few seconds. And here is what the syntax looks like: ;Script generated by AutoBuilder 0.4 Opt("GUICoordMode", 1) Opt("GUINotifyMode", 1) GuiCreate("MyGUI", 392,273,(@DesktopWidth-392)/2, (@DesktopHeight-273)/2 , 0x04CF0000) $checkbox_2 = GUISetControl("checkbox", "Nero 6", 10, 10, 100, 10) $checkbox_3 = GUISetControl("checkbox", "EZ CD Creator", 10, 30, 90, 10) $checkbox_4 = GUISetControl("checkbox", "Random Program", 10, 50, 80, 10) $button_1 = GUISetControl("button", "Select All", 110, 10, 160, 40) $button_2 = GUISetControl("button", "Start Installation", 110, 60, 150, 50) GuiShow() While 1 sleep(100) $msg = GuiMsg(0) Select Case $msg = -3 Exit Case $msg = 2 ;;; Case $msg = $checkbox_2 ;;; Case $msg = $checkbox_3 ;;; Case $msg = $checkbox_4 ;;; Case $msg = $button_1 ;;; Case $msg = $button_2 ;;; EndSelect WEnd Exit All you would need to do is put your code where ";;;" currently exsists.
-
I have a PowerDVD suite which also installs a suite of applications and would like to limit what it installs. How did you find the values for the EZ CD Creator for ADDLOCAL?
-
Select Software To Install GUI interface
Metzen replied to Astalavista's topic in Unattended Windows 2000/XP/2003
AutoIt GUI? Someone here made a limited GUI creation tool which follows the AutoIt v3 syntax and can send console commands to applications (@comspec setup.exe -s -f1\\blah\blah\setup.iss)... See below for a screen shot of the creation environment.
-
I don't have any suggestions, unfortunately, but could you post the Ghost 9.0 TXTSETUP.SIF file? Thanks, Metzen
-
Can you post the TXTSETUP.SIF from it?
-
fasttrak.sys couldn't be found
Metzen replied to frank312's topic in Unattended Windows 2000/XP/2003
You get inaccessible boot device because Windows finds the driver during TEXTMODE install but needs the driver to be found and loaded during the GUI mode part. When the GUI mode part launches, and it doesn't have the SATA/RAID driver, you get the error you see there. Read this for finishing up integration of the FastTrak driver. Essentially, you need to create a folder structure: i386 \$oem$ - - \$1 - - - \Drivers - - - - - \RAID With all your fasttrak drivers in the ROOT of the RAID folder so the folder looks like: fasttrak.inf fasttrak.dll etc. In your winnt.sif add the following line under the [unattended] section: OemPnPDriversPath = "Drivers\RAID" -
fasttrak.sys couldn't be found
Metzen replied to frank312's topic in Unattended Windows 2000/XP/2003
Did you add any lines to DOSNET.inf? -
I guess I should have mentioned that: [HKEY_USERS\.DEFAULT\Software\Microsoft\Windows\CurrentVersion\Explorer\StuckRects2] should be installed with cmdlines.txt as it will make the "small icons" on the classic start menu for all users created by the default account (your exsisting account would predate this). Changing it to: [HKEY_CURRENT_USER\Software\Microsoft\Windows\CurrentVersion\Explorer\StuckRects2] Though, just to be safe you should probably slip both registry keys in via cmdlines.txt Should affect your current user account. To verify this works, follow jrzycrim instructions.
-
No.
-
I can confirm that the StuckRects2 key I posted works. When I removed it from my WinPE all the icons got big. Enjoy... [edit]Hmm.... Now I'm not so sure... Readding all those values did not bring me back my small icons... [edit2] Nevermind, I added it back in wrong, the above worked for me [edit3] The only three values needed in StuckRects2 that must be included to get small icons to work are: "Settings"=hex:28,00,00,00,00,00,00,ff,06,00,00,00,03,00,00,00,00,00,00,00,00,\ 00,00,00,00,00,00,00,00,00,00,00,00,00,00,00,00,00,00,00 The 03 listed there is for the position of the Task Bar. You can alter it's position by changing this value. 00 = the left, 01 = the top, 02 = the right side, 03 = the bottom side and so on. The 06 listing tells the taskbar that it's the classic start menu, small icons mode, with taskbar always on top. Changing this value to 04 makes it so you can disable taskbar always on top. Have fun!
-
FOR ALL THOSE LOOKING FOR "SMALL ICONS" ON THE CLASSIC START MENU I figured this out a looong time ago (after many, many hours) for my Windows PE environment. Alas, I do not remember the exact keys. I believe these were them, however: [HKEY_USERS\.DEFAULT\Software\Microsoft\Windows\CurrentVersion\Explorer\StuckRects2] "Settings"=hex:28,00,00,00,00,00,00,ff,06,00,00,00,03,00,00,00,00,00,00,00,00,\ 00,00,00,00,00,00,00,00,00,00,00,00,00,00,00,00,00,00,00 Try them and see if it works, I'll try to confirm it again. Attached is a screenshot to show it is possible.
-
Please post your SiI3112 hardware IDs!
Metzen replied to Bâshrat the Sneaky's topic in Device Drivers
PCI\VEN_1095&DEV_3112&SUBSYS_61121095&REV_02\4&3B1D9AB8&0&5840 ASUS A7N8X-E Deluxe I'm not sure which method I used... I downloaded these drivers, added the relevant lines to the TXTSETUP.SIF and then made a folder /Windows/PnP/MassStorage/SIIMAGE with the drivers installed and added this line to Unattend.txt: OemDriversPath = Windows/PnP/MassStorage/SIIMAGE I'm not sure what method that is, but that worked for me. -
Please post your SiI3112 hardware IDs!
Metzen replied to Bâshrat the Sneaky's topic in Device Drivers
Service Pack 2 includes the ability to check the hardware ID's without downloading Devcon.exe now. Simply go into Device Manager and go into "Properties" of the driver you want, click the "Details" tab, under Property, choose "Hardware Ids" and copy and paste the first one here. -
Run a batch file at the T-39 using DetachProgram. Include this: REG ADD "HKEY_CURRENT_USER\Software\Microsoft\Driver Signing" /t REG_DWORD /v Policy /d 0 /f REG ADD "HKEY_LOCAL_MACHINE\Software\Microsoft\Driver Signing" /t REG_BINARY /v Policy /d 00 /f REG ADD "HKEY_LOCAL_MACHINE\Software\Microsoft\Non-Driver Signing" /t REG_BINARY /v Policy /d 00 /f REG ADD "HKEY_USERS\.DEFAULT\Software\Microsoft\Driver Signing" /t REG_DWORD /v Policy /d 0 /f Does it work?
-
I have not had that problem (with 4.8 drivers/control panel/wdm). I will post my setup.iss file later today. EDIT -- Nevermind, my bad, thinking of something else.
-
Please post your SiI3112 hardware IDs!
Metzen replied to Bâshrat the Sneaky's topic in Device Drivers
What's the problem? The sii3112 and si3112r use different hardware-id's and driver files don't they? Just include both in your install and let Windows do the searching... Right? -
I've spoken to a rep at Microsoft and he has informed me (and what we're all finding) that there's no way around the "different driver same hardwareid" issue. The current solution is to use either/or but not both (the first associated hardware-id will always be the one loaded). Sadly, renaming the file will not resolve any problems as both the Promise SATA IDE/RAID modes share the same hardware-id's. The only known solution is to get your vendor to change the hardware ID's for the hardware and the drivers
-
Find NVIDIA or ATI via batch file
Metzen replied to edg21's topic in Unattended Windows 2000/XP/2003
I just wanted to add that this is going to help me tremendously when rolling out PC's. Currently, we have batch files setup to ask you if you have X or Y hardware and jump to whatever answer you choose and run a silent install. But with the methods listed here, finding the correct hardware and installing the drivers either through finding the files or devcon will help me automate the process a whole lot more. I was aware of devcon.exe in the past because I use it for silently installing a AMD processor driver that enables Cool N' Quiet on a ASUS board, but never thought of using it as a detection utility. Just wanted to say thanks for sharing your ideas. -
If you use Windows PE to setup your install, you will get exactly that. I do not know how to do it with a CD install of Windows though.